
TIME FRAMES
Setup and Management Guide:
Time Frames define specific periods when certain actions, such as routing calls take place. They are essential for managing how your phone system responds at different times of the day, week, or year.
You can create and manage Time Frames by clicking the Time Frame icon in the top navigation menu. This opens a list of all available Time Frames:
- Black-named Time Frames: Created at the domain level. These are shared across the organization and cannot be edited or deleted by individual users.
- Blue-named Time Frames: Created by you. These can be edited or deleted as needed.
If you need changes made to domain-level Time Frames, contact your phone system administrator.
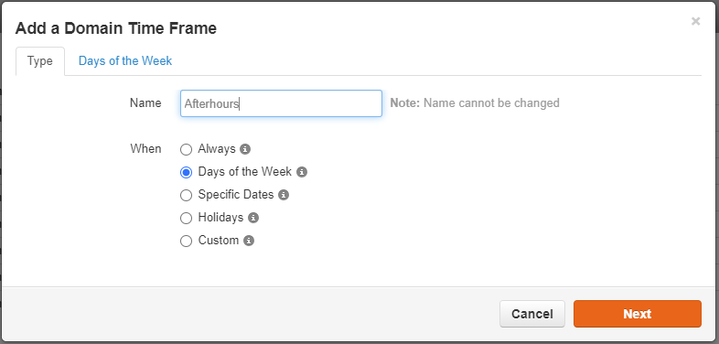
Adding a Time Frame:
Click the Add Time Frame button.
The Add Time Frame window will appear (shown to the right).
Choose when the Time Frame should be active. There are four main types:
1. Always: This option makes this rule always in effect 24 hours a day, 7 days a week, 365 days per year. This is often used as a 'toggle'
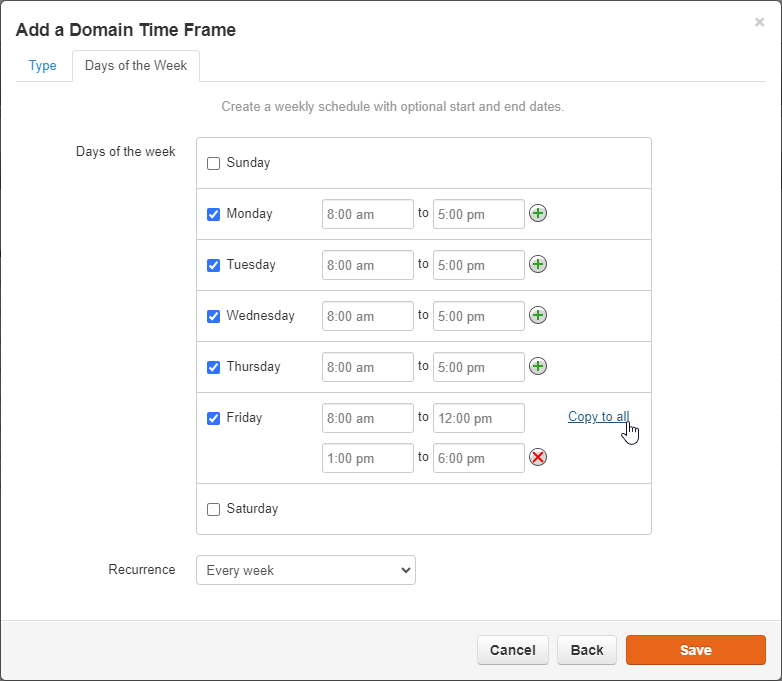
2. Days of the Week: Define recurring weekly schedules. You can:
Select specific days using checkboxes.
Set start and end times for each day.
Use Copy to All to apply one schedule across multiple days.
Add multiple time blocks to a single day with the green plus (+) icon.
This is ideal for standard business hours or shift-based schedules.
 |
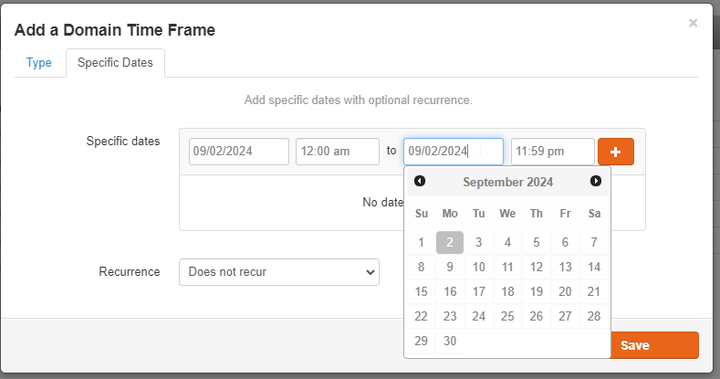
3. Specific Dates
Set a Time Frame for a particular date or date range. You can:
Select start and end dates from a calendar.
Enter start and end times.
Set recurrence (e.g., monthly, yearly).
Add multiple date ranges with the orange plus (+) icon.
This is useful for events like company meetings, seasonal hours, or temporary changes.
4. Holiday
Pre-program holidays into your system. You can:
Search for and select a holiday
Define the active time range for that holiday
Set recurrence (e.g., repeat every year)
Click Next to proceed
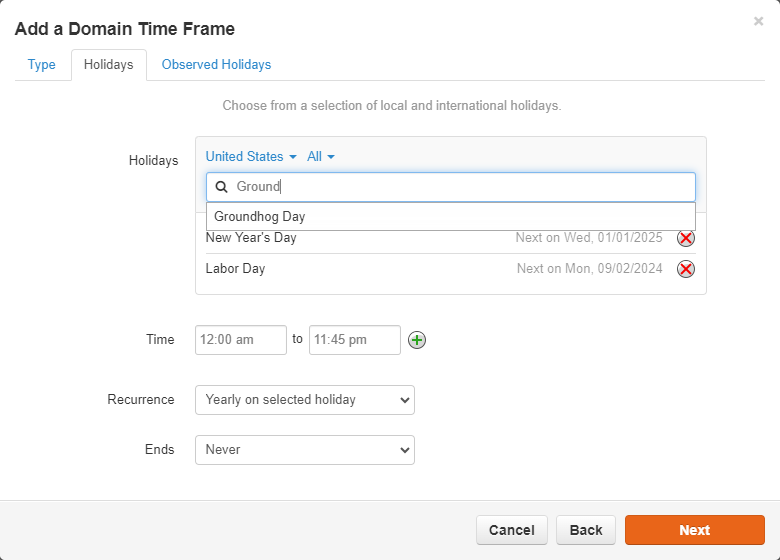
Once completed, you the can set the Observed Holiday logic. This tells the system when a holiday will be observed based on the day of the week it falls on. Once complete, click Save to finalize your Holiday Time Frame. Custom Time FramesYou can combine different types (Always, Days of the Week, Specific Dates, Holiday) within a single Time Frame to create flexible schedules tailored to your organization’s needs. | 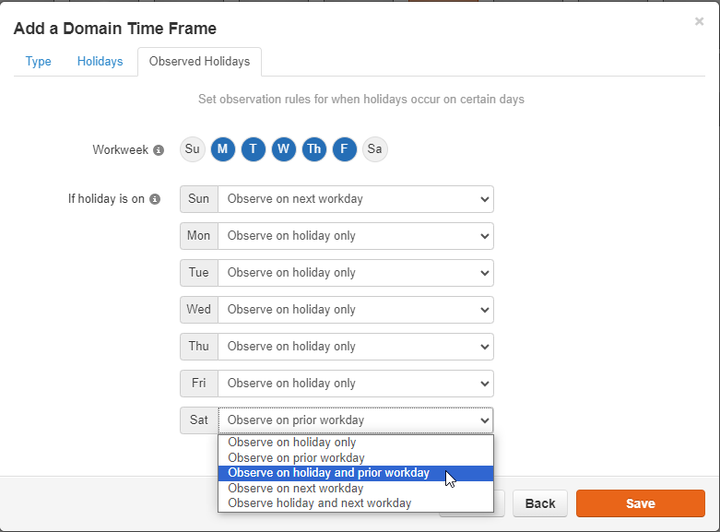 |
NOTE: For details on applying Time Frames, see: [Applying Time Frames].
Editing and Deleting Time Frames
Click the pencil icon to edit a Time Frame you created.
Click the X icon to delete it.
Was this article helpful?
That’s Great!
Thank you for your feedback
Sorry! We couldn't be helpful
Thank you for your feedback
Feedback sent
We appreciate your effort and will try to fix the article